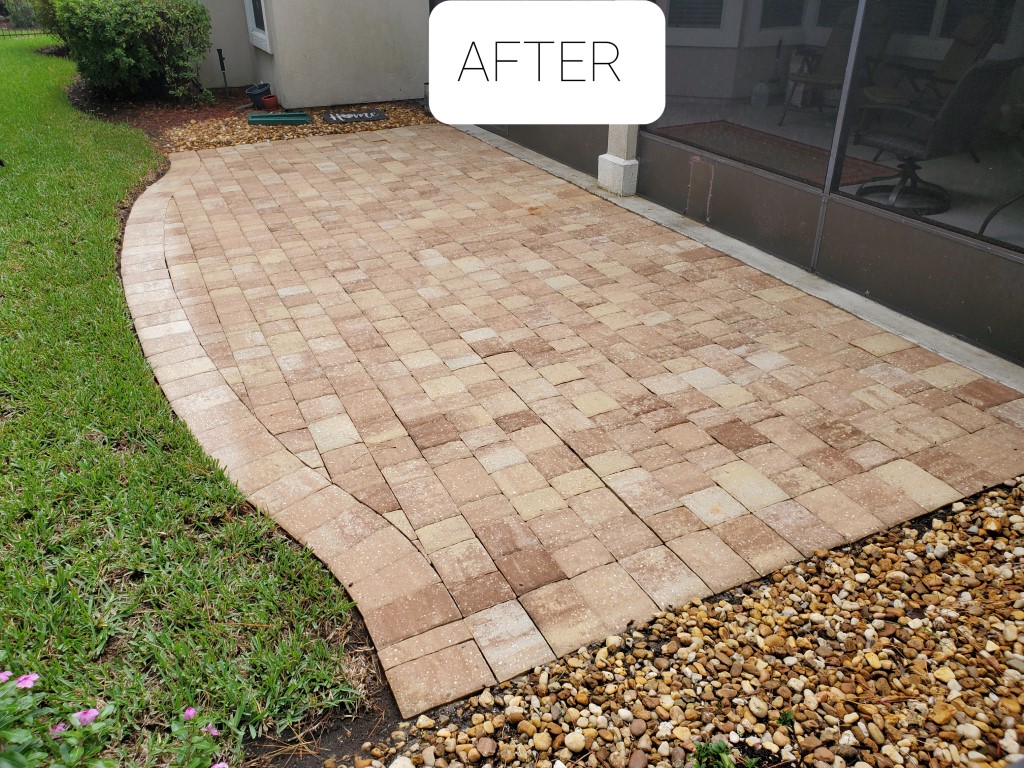
Effective Methods for Cleaning Pavers
Maintaining the pristine appearance of pavers requires a thorough and strategic cleaning process. Whether these pavers are part of a driveway, patio, or walkway, they inevitably accumulate dirt, debris, and stains over time. To restore their original beauty, it’s essential to follow a systematic cleaning procedure. This involves clearing large debris, applying a cleanser, and utilizing a power washer effectively, especially for the grooves. Here’s a detailed guide on how to achieve a clean and appealing paver surface.
Initial Surface Preparation
Before diving into the deep cleaning process, the first step is to clear the surface of any large debris. This can be accomplished by sweeping the area thoroughly. Use a stiff-bristled broom to ensure that all loose dirt, leaves, and other debris are removed. This initial step is crucial as it prevents the power washer from pushing the loose debris into the grooves or deeper into the paver surface, which could complicate the cleaning process later.
Applying a Cleanser
Once the surface is free of large debris, the next step is to apply a cleanser. The purpose of the cleanser is to loosen dirt and stains, making them easier to wash away. You can either purchase a commercial cleaning solution specifically designed for pavers or make a homemade cleanser. A simple and effective homemade solution consists of water, soap, bleach, and vinegar.
To create this mixture, combine:
- 2 gallons of water
- 1 cup of bleach
- 1 cup of white vinegar
- A few tablespoons of liquid dish soap
This combination leverages the cleaning power of bleach and vinegar, both of which are excellent at breaking down dirt and mildew, while the soap helps to emulsify grease and grime. Apply the solution generously across the paver surface using a garden sprayer or a large watering can. Make sure to cover all areas, paying extra attention to particularly stained or dirty spots. Allow the cleanser to soak in for a few minutes, typically around 10-15 minutes, but avoid letting it dry out completely. This soaking period allows the solution to penetrate the dirt and stains, loosening them and making them easier to remove with the power washer.
Power Washing the Surface
After the soaking period, the power washer comes into play. Power washers are incredibly effective for cleaning pavers due to their high-pressure water jets that can dislodge and remove stubborn dirt and grime. However, using the power washer correctly is vital to avoid damaging the pavers.
- Choosing the Right Nozzle: Start by selecting a nozzle that produces a narrow, high-velocity stream. A 15-degree nozzle is generally recommended for paver cleaning. This nozzle strikes a balance between cleaning power and control, allowing you to clean efficiently without damaging the surface.
- Maintaining Proper Distance and Pressure: When using the power washer, maintain a consistent distance of about 12-18 inches from the surface. Holding the nozzle too close can damage the pavers by eroding the surface or dislodging joint sand. Conversely, holding it too far away reduces the cleaning effectiveness. Adjust the pressure setting to a medium level; high pressure is not usually necessary and can be harmful.
- Cleaning Technique: Begin power washing at one end of the area and move systematically to the other end. Use a sweeping motion, and overlap each pass slightly to ensure comprehensive coverage. Pay special attention to heavily stained areas, but be cautious not to linger too long in one spot to avoid surface damage.
Getting into the Grooves
One of the most challenging aspects of cleaning pavers is addressing the grooves or joints between the pavers. These grooves often harbor dirt, moss, and weeds, which can be tough to clean with a regular cleaning solution. The power washer, however, can blast away this debris effectively.
- Adjusting the Nozzle for Grooves: For the grooves, you might need to switch to a nozzle with a narrower spray pattern, such as a 0-degree nozzle, which produces a pinpoint jet of water. This can effectively target the dirt within the grooves without spreading debris across the surface.
- Gentle Pressure Application: Despite the narrow stream, apply gentle pressure and maintain a steady hand. Keep the nozzle moving and avoid holding it stationary over the grooves, as this can erode the joint sand and destabilize the pavers.
- Replenishing Joint Sand: After cleaning the grooves, it’s essential to inspect the joints for any loss of sand. If necessary, replenish the joint sand to maintain the stability and appearance of the pavers. Simply sweep fine, dry sand over the surface and into the joints, and then mist with water to settle the sand.